
How to use Laravel Forge with Amazon Web Services EC2
I've been using Laravel Forge for quite a while now to handle to DevOps side of things and i've found it to be an invaluable tool. That said I've always used Digital Ocean to spin up my servers which has been super simple. However recently I've been looking more into AWS and all the services they offer.
One thing I found was that spinning up EC2 instances via Forge just didn't work. After creating a user and giving said user programmatical access, Forge would create the server, but it wouldn't be able to connect to it afterwards. In my Forge dashboard i'd see the new server instance, but it would never obtain an IP address and could never connect to it. Within about 10 minutes the server would disappear from from the list, but still be running in AWS!
There's a few blogs posts out there that describe how to setup AWS/EC2 to work with Forge, but I don't think they go all the way in detailing exactly what you need to do before you provision a new server with EC2. This post will go over everything you need to use Forge and AWS EC2.
Step 1 - Prepare AWS
So to begin, you're going to need to create a new user with programmatic API access and give them a few permissions. Start by signing into your AWS account with a non root user. Once signed in navigate over to the IAM dashboard.
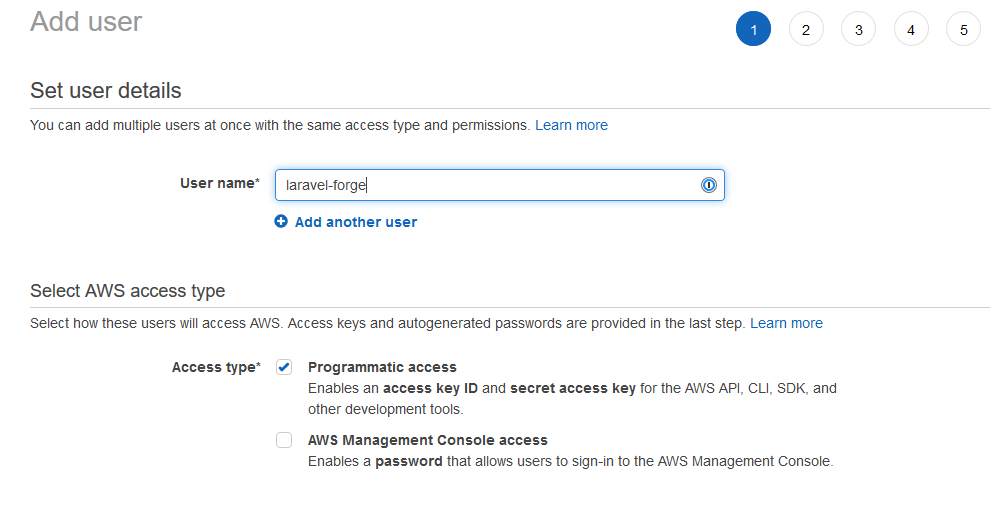
- In the left hand menu, click on 'User' and then click the 'Add User' button.
- Give the User a name, E.g. 'laravel-forge'
- Under access type, choose 'Programmatic access'
- Click 'Next: Permissions'
Set Permissions
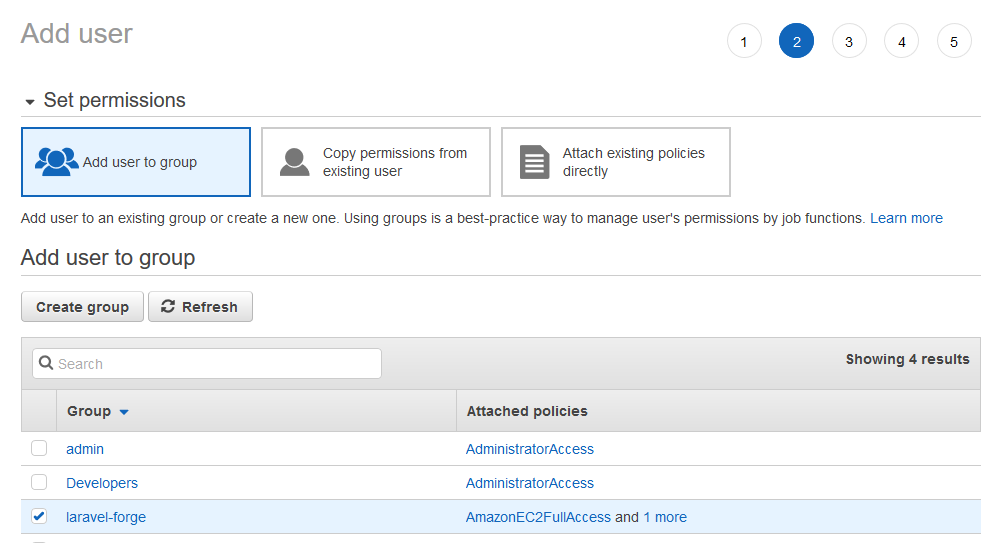
Next you'll see a screen asking you to assign permissions to the new user. You add this new user to a group, so go ahead and click the 'Create group' button.
- Give the group a name, 'laravel-forge' will do fine
- Grant the following policies to the group:
- AmazonEC2FullAccess
- AmazonVPCFullAccess
- Click 'Create group' button
You should see the new group in a list, select this and then click on 'Next: Tags'
You can safely skip over the tags section, however feel free to add any tags describing the user account if you wish. After tags is the review page. Check over the details and press the Create user button.
You should be shown a succes page. On here you will find your Access Key Id and Secret Access Key. Copy these somewhere safe as you won't be able to access the secret key after this screen. You'll also need these keys when you add AWS to your Forge account.
However before we head over to Forge, we need to do one last bit of configuration. We need to edit the security group for our EC2 instances.
Configuring the EC2 Security Group - The bit that catches most people out!
From the AWS console. navigate to the EC2 dashboardand click on the 'Security Groups' Link:
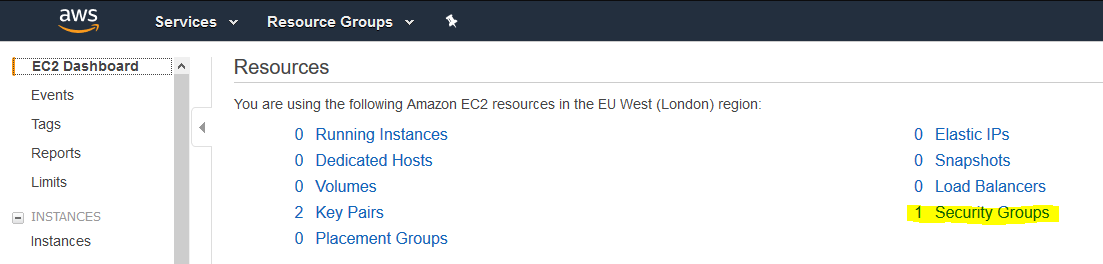
You'll be taken to the security groups page where you might see a few options in a table. You want to find and edit the default group / inbound rules. This should pop up a modal with some entries. The reason why Forge fails to connect / provision your server after you've created it is because of the default security group doesn't allow Forge to SSH into the new server, so you have to grant it access first!
You'll want to add rules for the following:
- HTTP on port 80
- HTTPS on port 443
- SSH for your PC's IP address
- Your IP address with a /32 on the end
- E.g 192.0.0.1/32
- SSH for Laravel Forge access
- 159.203.161.246/32
- 159.203.163.240/32
You can use the below image as a reference:
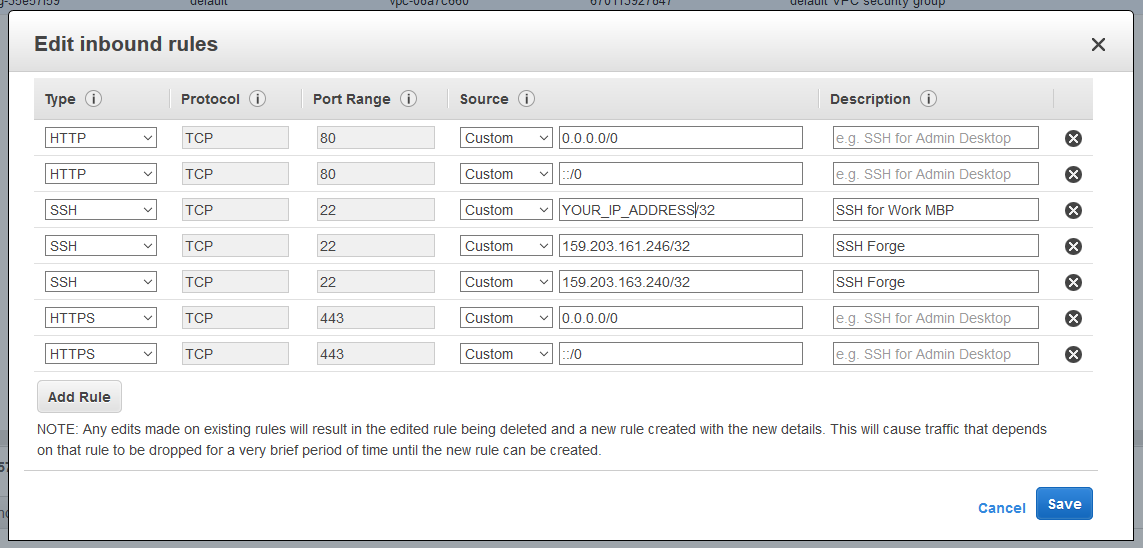
Click on 'Save' and we should be ready to head over to Forge to complete the setup!
Step 2 - Prepare Laravel Forge
Log into your Forge account and from the dashboard page you can either click on the AWS provider box at the top of the page or you can go to: My Account > Server Providers and you'll be taken to a screen where you can input your AWS Access Key Id and Secret Access Key.
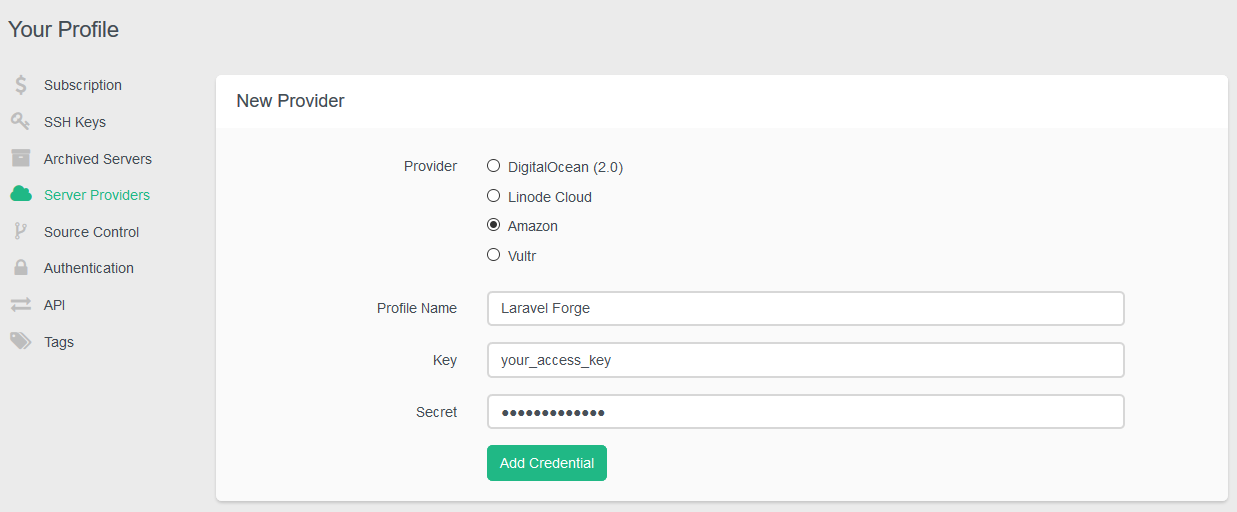
- Enter a profile name
- Laravel Forge will do fine
- Enter your key
- Your AWS Access Key Id
- Enter your secret
- Your AWS Secrect Access Key
Once you added the above details click on the 'Add Credential' button and it should appear in the list of active providers below.
Next return to the Dashboard and click on the AWS logo and choose your server setup. Make sure to choose your default security group from the VPC select drop down and create your server.
It can take a good 10 minutes for the server to provision, but with a bit of luck it should create, connect and provision your server without any problems!
